Thursday, 7 November 2013

Korg A5 Repair

I bought this from Ebay, and it was sold as Spares Repair.

After powering up there was no response from the unit; after checking the power rails there was no power getting to the 7805 5 volt regulator. I found that one of the input jack terminals had completely broke the copper track it was soldered on to.


I removed the solder from the bad pin; the broken track just fell away leaving the bare board around the pin.


I
I soldered on a wire link to bridge the gap where the track was missing.
Then I cleaned the main PCB board,  including all the switches and pots.


One of the switches showed a lot of corrosion; perhaps something was spilt onto the board through the stomp foot pedal at some point.

After I checked the switch it turned out to be faulty;  but luckily I had some old keyword switches lying around;  the keyword switch was a perfect replacement, and soldered directly in;  the only problem was - it was the wrong height!  so I ended up cutting a small piece off a spare rubber foot that had adhesive attached, and that seemed to do the trick very nicely!


So after that I put it all back together and powered it up it worked fine;  I noticed the input jack wasn't great, so I will replace that with some spare ones when I get a spare minute.


I found a spare minute to change both the guitar input jack and the output jack;  the input tab had broken, hence the bad connection, and the output had partially broke;  I also added some "hot-snot" glue to help reduce any jack movement.


Saturday, 31 August 2013

Low Cost 8 Channel Logic Analyser

!!! Since this was posted I've learned that these cheap logic analysers are basically copy-cat rip-off hardware labelled up to look like they are made Saleae;  these aren't by Saleae!  If you're looking for a decent low cost logic analyser with superb software check-out the proper Saleae ones.


Quite a small compact little unit. It's rather cheap looking but I wouldn't expect too much for the price.


Hooked up and ready to capture some data.


Capturing a short burst of I2C data from the uC to the 24LC512 chip.


This was my first experience of a capture of my I2C signal from my board;   it looks ok, although I can't pass much of a judgement on this unit until I've used it a bit more; but on first impressions - it looks pretty good value for money!

Wednesday, 14 August 2013

Basic Transistor Amplifier

The other day I decided to try and build a simple one transistor amplifier.


This is the circuit; and the transistor used was the BC546A.


I input a 20mV 10KHz sine wave test signal to the the input stage of the transistor amplifier.


This shows the original signal (top) and the amplified signal (bottom).
The input measured ~20mV and the output measured ~1.75V according to the scope.

Playing with a MAX6126 Voltage Reference


Recently I picked up some cheap MAX6126 chips from Ebay;  this is the Maxim blurb about them..

"Ultra-High-Precision, Ultra-Low-Noise, Series Voltage Reference Features 3ppm/°C (max) Temperature Coefficients and an Excellent ±0.02% (max) Initial Accuracy"
I created a simple layout and etched it on a board;  I should have added some caps as per the datasheet specifications and the long breadboard wires I suspect didn't help either!

Anyway when I applied some power and measured it with my recently calibrated bench meter it was really quite good;  the ambient temperature effected the readings slightly; as it showed ~2.048v when it was ~22°C - but if it was >22°C,  it tended to drift slightly below.


One thing it did prove; and that was that my other two DMM's that I suspected were slightly out - were indeed not as accurate as I had previously thought!

I have quite a few of these little chips left so I plan to see if I can create a more temperature stable version that I could use in another project.


A few days later I knocked up a little circuit on a breadboard that I plan to use to stabilize the voltage reference temperature; this might give me a reading that is more independent of the ambient room temperature.

The picture below shows the circuit setup on the lower part of the breadboard.  The LED is just hooked up as an indicator to show the cutoff point at which the transistor turns off.

What you can't see in the picture is me holding a hair dryer above the probe and thermistor; when the temperature reached about 41°C, the LED is beginning to switch-off.


At ~42°C the LED is very weakly lit;  this should give me a good starting point of the POT trim setting when I come to add the circuit to a little container.


I might keep the LED as an indicator on the final circuit;  but I plan to add some low ohm resistors and then drive them quite hard in order to generate some heat to warm a suitably small thermal chamber.

Saturday, 4 August 2012

Laminator for PCB Transfer


 Yesterday I bought a cheap A4 laminator from Tesco;  I'd seen PCBs done like this before so I thought I'd try it out myself as I didn't want to use the household iron as it does tend to smudge.

I used an old Press'N'Peel reject print I did some time ago; I did quite a few passes through the laminator before I cooled the PCB and removed the backing film. It seemed to work well, the only problem was having to put it through so many times.


I had an idea to add a push button switch on the motor wires, so I could pass the board through manually using the switch so it would hold the time in the laminator thus keeping it hot.


Ok. I've just added a push button to the motor; so now I can slow it down going through; it seems to work well!


Wednesday, 11 July 2012

Basic FPGA Board

A few weeks ago I ordered a simple FPGA board, it came with a Blaster USB programmer. FPGA's are something I've heard so much about, but never tried, so I thought it might be nice to try and create perhaps a cool video chip for my PAL TV experiments or maybe a simple logic analyzer; anyway - I'm sure it will be lots of fun and games!

Sunday, 17 June 2012

PAL TV Signals using a PIC

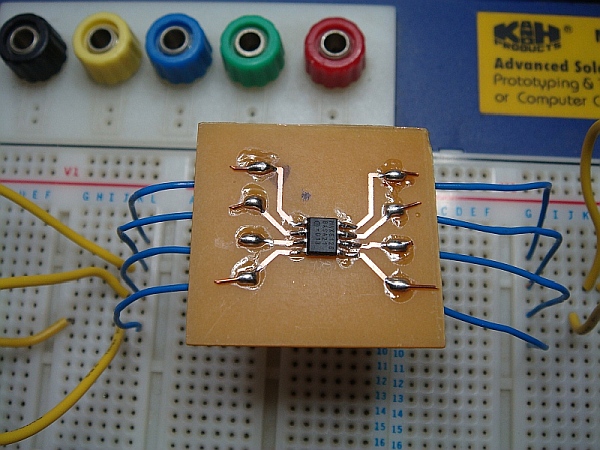
Whist I was leaning about PIC microcontrollers the thought had crossed my mind about the possibility of simple computer system, in such a system it would certainly be nice to use a real TV as the output display rather than a large expensive LCD module.


After doing some Google'ing I stumbled upon these superb explanations of how PAL TV signals work.

http://martin.hinner.info/vga/pal.html

http://www.rickard.gunee.com/projects/video/pic/gamesys.php


My first attempt used only Horizontal Sync signals followed by a striped pattern, the result is the image you can see above. Because there is no Vertical Sync the image is actually shifting vertically, but because of the nature of my pattern, it gives the appearance of a fixed stable picture.

Of course this is pretty useless for displaying anything useful as the picture needs to be static. So the next test was add Vertical Sync; In order to test the picture I'd need to alter the format of my test pattern to something that would show up if the VSync didn't work properly, ideally I should have used a checkerboard pattern but I opted for a simple code change. For this I simply added a black border of 50 scanlines, top and bottom of my striped pattern; and the result was the image below.


In this picture you can see the TV's text "AV"; this is not part of the signal generated, only the striped pattern is generated.


This signal produced is PAL non-interlaced, which means I don't generate field1 then field2 scanlines, I only generate a continuous set of scanlines.


The basic C code looks like..


        doVSyncNonInterlacePre();

        for(ucRasterLine=50; ucRasterLine!=0; ucRasterLine--) {
            doHSync();
            doBlackScanLine();
        }

        for(ucRasterLine=204; ucRasterLine!=0; ucRasterLine--) {
            doHSync();
            doScanLine();
        }

        for(ucRasterLine=50; ucRasterLine!=0; ucRasterLine--) {
            doHSync();
            doBlackScanLine();
        }

        doVSyncNonInterlacePost();


A simple explanation of the code is that my picture starts with a VSync non-interlace pre sequence, then for 50 scanlines it generates the HSync signal followed by a black scanline; Then the visible pattern is the HSync and stripes for 204 scanlines; and then the bottom black border, which is actually the same as the first top black border; And it finishes off with a VSync non-interlace post sequence; after which it repeats indefinitely.


In this example I decided to re-write the code to make it display a pattern dynamically across the horizontal. The pattern was white, dark grey and black bars. the gray is very dark! and doesn't show up much. The code required to make it dynamic requires more cpu cycles, this means the more time calculating what to display, the bigger your pixels will be! 


I'd like to play around with pal signals a little more in the future, but I think I will need to get a much faster PIC, my poor 16f877A running at 5Mhz ( 20Mhz / 4 ) is just far too slow.


.. to be continued!!! ;-)